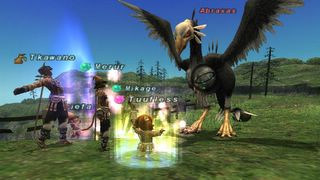
70-75 Lufaise Meadows (Manaburn)


Requirements/Notes:
* All party members require Chains of Promathia.
* All party members require Tavnazian Archipelago access.
* BRD/NIN recommended.
* Mobs are very difficult to Sleep.
* Supports 2 parties.


Target mobs:
Primary: Abraxas
* Roc
* Aggro to Sight
* Linking
* Weak against Ice
* Weak against Light
* Strong against Wind

Primary: Tavnazian Ram *see comments
* Ram
* Aggro to Sight
* Linking
* Strong against Ice

Commentarus:
Because Abraxas have very fast attacks, it's quite likely that your Bard puller will die if he/she does not come equipped with a /NIN subjob. A RDM puller can possibly survive through other tricks like Gravity. This place is actually pretty nice for manaburning, since mobs here are very plentiful (5 minute repops). As a manaburn party though, you may want to consider camping at the more northern camp, tucked away in a corner by the fence. This not only gives you easy access to the mobs that spawn around you, but also lets the BLMs nuke at the Abraxas below where you are camping for longer chains.

Once things get flowing, it's easy to get Chain #7 or #8 here. You can push things a little and get a Chain #10 if your puller is very good. Manaburning here at a fairly relaxed rate nets approximately 7500xp/hr.

Be careful on pulls though, since Abraxas are the devil to Sleep, even with capped Enfeebling Magic and +Enfeebling Magic skill. If anything, Lullaby may be able to sleep Abraxas links.

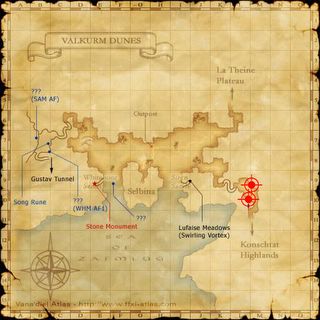
9-11 Valkurm Dunes


Requirements/Notes:
* Silent Oils may be needed. *see comments
* Popular campsite.
* Supports 2 parties.

Fields of Valor:
Book: (H-7), (K-6), (L-11)
Page 1: 7x Hill Lizard, 1x Sand Hare (475xp/gil)


Target mobs:
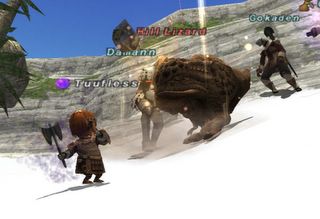
Primary: Hill Lizard
* Lizard
* Not Aggro
* Links by Sound
* Weak against Ice
* Weak against Wind

Commentarus:
It's highly recommended that you set your homepoint at the gate guard by the zone to the Konschtat Highlands. In the event you die, you can just homepoint and continue from where you left off. At this level, you only lose 250xp or so from a homepoint, and in the time it will take your party to find someone who can Raise, and rest off weakness (5 minutes), you would've gotten more xp just by homepointing and walking back to camp.

Keep the Lizard away from the mages, since they have an Area of Effect (AoE) move, Fireball.

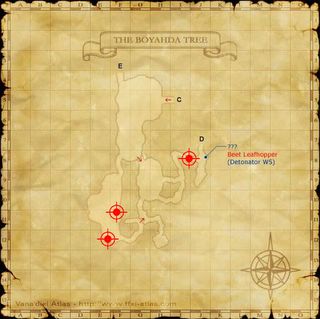
66-69 Boyahda Tree (Darter)


Requirements/Notes:
* WHM or /WHM recommended.
* Supports 2 parties.


Target mobs:
Primary: Darter
* Fly
* Not Aggro
* Links by Sound
* Weak to Piercing weapons
* Weak to Ice
* Strong against Wind

Secondary: Steelshell
* Crab
* Aggro to Sound
* Not Linking
* Weak to Ice
* Weak to Thunder
* Strong against Water

Secondary: Processionaire
* Crawler
* Aggro to Sound
* Links by Sound
* Weak to Ice
* Weak to Thunder
* Weak to Darkness

Commentarus:
Your secondary mob depends on where you camp. The northern camp is not too far from the waterfall drop that you fall down from the top level of the Boyahda Tree. There, you will focus on Darters with the occasional Steelshell.

The pond camp has slightly more in terms of Darters, but only has the comparatively weaker Processionaires to act as filler when the Darter population gets sparse. It is also slightly safer in the pond, too since the camp area is more spacious, and you do not have to contend with a wide variety of various attacks, not to mention that pulling Processionaires at the pond is a whole lot safer than tring to pull a Darter while dodging aggro from just about everything in the room.

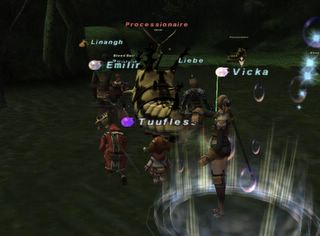
62-65 Boyahda Tree (Processionaires)


Requirements/Notes:
* RDM or BRD practically required.
* Supports 4 parties.


Target mobs:
Primary: Processionaire
* Crawler
* Aggro to Sound
* Links by Sound
* Weak to Ice
* Weak to Thunder
* Weak to Darkness

Commentarus:
There are two main areas to camp when hunting Processionaires. One is on the top floor of the Boyahda Tree through the tunnels just a little NW of the waterfall. There is a downwards tunnel that can support two parties. However, be careful with pops in the tunnel itself. Also note that a lot of the Processionaires here come in pairs, so having a competing party here might not be altogether bad, since you can easily split the pair of crawlers between the two of you.

However, my preferred Processionaire camp is in the lake at the bottom of the Boyahda Tree, near the Ancient Goobbue, simply because it is a lot safer. While the tunnel camps do let your mages cast AoE (which could be relevant with a Waterga III MB on Distortion), because you're camping near or on a lake, you can literally pull Processionaires with reckless abandon, since they lose track of you over water. Of course, because of this, pulling can get a little irritating at times, but it's nice to know that you will almost never have to deal with a link. You can also camp just off the lake, a little south, as well.

63-66 Boyahda Tree (Steelshells)


Requirements/Notes:
* RDM or BRD practically required.
* Supports 4 parties.

Target mobs:
Primary: Steelshell
* Crab
* Aggro to Sound
* Not Linking
* Weak to Ice
* Weak to Thunder
* Strong against Water

Primary: Skimmer
* Fly
* Not Aggro
* Links by Sound
* Weak to Piercing Weapons
* Weak to Ice
* Strong against Wind

Primary: Darter
* Fly
* Not Aggro
* Links by Sound
* Weak to Piercing Weapons
* Weak to Ice
* Strong against Wind

Commentarus:
Camp on the island with the tree in the middle of the lake (it has a ??? on the east side) for easy access to Steelshells and Skimmers should you need them to keep the chain. Alternatively, camp by the waterfall further south. Each camp has their perks.

The tree camp is a little tricky to navigate and maneuver, making it a favourite for manaburn parties that generally don't shift their members around very often. You can potentially have the mages sit on the island and the melee fight on the water, although be sure that you're not fighting close to any Steelshell pops. Also, make sure nobody clicks on the ??? if they have the Sleepga II quest active, otherwise you might find your party dead from a rather nasty Ahriman NM. ^^

The waterfall camp isn't very lag friendly (although it is pretty!) Pulls don't crossover that much since you have a Steelshell and a Skimmer in the tunnel leading towards the Cloister of Storms to look forward to, but the majority of your pulls will still come from the direction of the central tree. One thing to watch out for when camping at the waterfall are the Water Elementals that spawn very close to camp when it is rainy weather.

If you decide to go down to the lower levels of the Boyahda Tree, you have the option of xp'ing off Darters as well, although those are harder than the Steelshells. There are enough Steelshells down there to support a party, anyway.

53-56 Boyahda Tree


Requirements/Notes:
* RDM or BRD practically required.
* Supports 2-3 parties.


Target mobs:
Primary: Robber Crab
* Crab
* Aggro to Sound
* Not Linking
* Weak to Ice
* Weak to Thunder
* Strong against Water

Primary: Knight Crawler
* Crawler
* Aggro to Sound
* Links by Sound
* Weak to Ice
* Weak to Thunder
* Weak to Darkness

Commentarus:
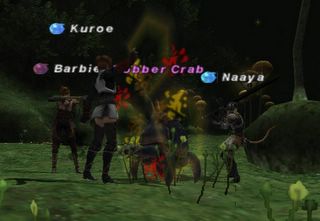
The Robber Crabs in the Boyahda Tree are just slightly higher level than the ones you will find in Kuftal Tunnel. As usual, these crabs love to spam buffs, so having a RDM or a BRD is even more important because of both mana refresh and Dispel.

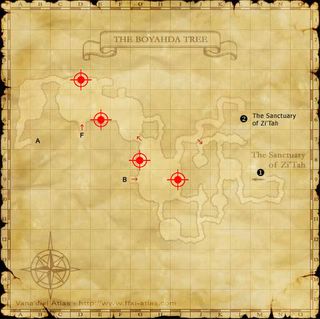
There are four main hillocks that are found on the lower floor of the Boyahda Tree, as marked on the map, and each "section" of the lower floor has two hillocks, each supporting one, or two parties each. Personally, I've felt that the mobs were a little sparse with two parties in one section, which is why I say this place only supports two parties, maybe three.

Each section also has a tree on an island with about two Knight Crawlers. You can xp off those as well if Robber Crabs are a little sparse. The good thing is that since crawlers track by scent, they lose aggro on you through water, so even though the crawlers will link, you will probably still be able to pull anyway and the "moat" surrounding the tree will deal with the linked crawler for you.

One problem with the Boyahda Tree is that you cannot cast any AoE spells while in here for fear that you might accidentally hit any one of the link-tastic Mandragoras or Rabbits in the area. Also, if you're in the more south-easternly section, watch for Aquarius should he spawn.

33-35 Garlaige Citadel


Requirements/Notes:
* Supports 3 parties


Target mobs:
Primary: Wingrat
* Bat (Triplet)
* Links by Sound
* Weak to Piercing weapons
* Weak to Wind
* Weak to Light
* Very Strong against Darkness

Primary: Siege Bat
* Bat (Single)
* Links by Sound
* Weak to Piercing Weapons
* Weak to Wind
* Weak to Light
* Strong against Darkness

Primary: Borer Beetle
* Beetle
* Aggro to Sight
* Not Linking
* Weak to Ice
* Weak to Light

Commentarus:
Nicknamed the "Garlaige Sh*tadel" by many, this place is actually very, very good xp with a party that knows what they're doing, and if the place is open.

Unfortunately, because of this, the Garlaige Citadel is very rarely open to just one party, and the calibre of players you would commonly find here have led a lot of the more experienced players to avoid this place in order to preserve their sanity.

It is still a very popular camp, so be sure to check the area via {/search} to make sure it's not overcrowded before you go.

The entrance to the Garlaige Citadel usually houses two parties (preference is obviously to just one party), while another camp can be found just outside the first banishing gate (my personal preference). Another can be found in the farther SW corner (not displayed), but be careful of a Beetle pop closely.

59-63 Monastic Cavern


Requirements/Notes:
* At least one party member requires a Key Item: Crimson Orb.
* Supports 2 parties.

Target mobs:
Primary: Orcs
* Orc
* Aggro to Sight
* Links by Sight
* Weak against Water

Orcish Champion (MNK)
Orcish Dragoon (DRG)
Orcish Dreadnought (WAR)
Orcish Farkiller (RNG)
Orcish Protector (PLD)

Commentarus:
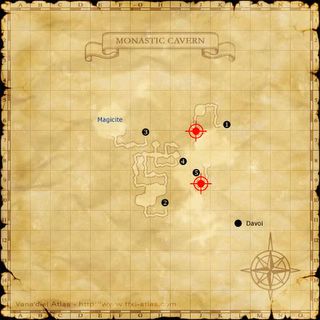
There are two possible campsites in the Monastic Cavern- one just at the zone to the Monastic Cavern, and one just by the ??? for the Orcish crest that's needed for Genkai 3. If you're camping by the ??? however, take care not to drop down into te lower level region of the Monastic Cavern.

Note that the camp isn't immediately accessible through Davoi. You have you first zone into the Monastic Cavern from Davoi, then re-enter the higher-level region of Davoi (the house on the hill), before zoning back into the Monastic Cavern through the Wall of Banishing (which requires a Crimson Orb to open). If you have someone familiar with how to get to the ??? for the Orcish Crest, more power to you.

Orcs have a lot of HP, especially since all the mobs you fight here are heavy melee, with the exception of Farkillers. Orcish Protectors are a particular nuisance, and are even slightly higher up in level compared to the other Orcs. Expect the fights to go long, ending on a Chain #4. Fortunately, this place seems to be less crowded in recent times thanks to alternate CoP locations, so it is still a good fallback if other places are crowded.

Be very careful not to accidentally pull, or link any of the HNM Orcs (Orcish Hexspinner, Overlord, Warlord, or Overlord Bakgodek). Since they are also HNM, be careful when passing through the area en route to the ??? camp since they also have true sight, although if you just hug your left hand wall while going to camp, you'll be fine.

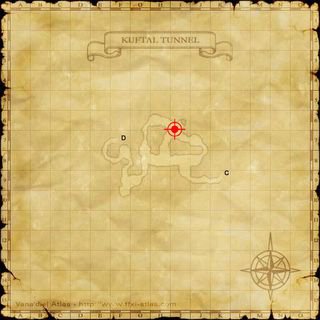
67-71 Kuftal Tunnel


Requirements/Notes:
* WHM required (for Stona).
* All mages /WHM recommended (for Paralyna).
* One stack of Echo Drops recommended per mage/PLD/NIN.
* Supports 2 parties.


Target mobs:
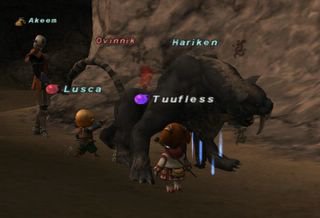
Primary: Ovinnik
* Tiger
* Aggro to Sight
* Not Linking
* Weak against Fire
* Weak against Lightning
* Strong against Ice

Primary: Greater Cockatrice
* Cockatrice
* Aggro to Sight
* Not Linking
* Weak against Wind
* Strong against Earth

Commentarus:
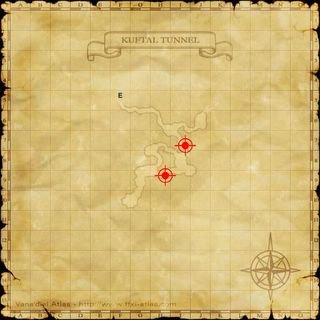
The camps are in the lower levels of the Kuftal Tunnel, where the higher-level mobs are. To get below, head to the main sand room and go to the side tunnel that runs east to west. There may, or may not be a rock blocking the way down to the lower levels- if there is one, just wait ten minutes or so for it to go down. There are Recluse Spiders nearby (sound aggro) as well as an Ovinnik near the top (sight aggro), and if that wasn't enough, there may also be some Air Elementals (magic aggro) nearby, too. Push come to shove though, it isn't nearly as bad as it sounds.

Pull from either end of the tunnel. Camps are behind the rock that goes down every 10-15 minutes, allowing access to the lower areas of Kuftal Tunnel. Keep the mages and melee separate for there are some AoE effects you don't want the mages to get hit by.

Mages should pre-empt the following abilities:
Roar (Ovinniks): AoE Paralyze.
Baleful Gaze (Greater Cockatrice): Single target Petrification.
Sound Vacuum (Greater Cockatrice): Line-of-Sight Silence.


Roar is particularly annoying since it is AoE. Assign each mage with a melee to Paralyna in order to make things easier. The (I-7) camp (more north) actually has an Ovinnik pop in camp, but is rather rare, and easily dealt with.


Roaming merit point parties are also possible here, although since you will be taking up everybody else's mobs, please be considerate of others and check that the bottom of Kuftal Tunnel is actually empty before you go. Generally speaking though, merit parties will find the mobs really weak, and so maximize on their melee's damage output.

The best results I've seen from a merit point party in Kuftal involve three DD melees that are either NIN or /NIN, two BRDs, and either a WHM (for Stona) or RDM/WHM (yes, some parties go without a Stona!)

73-75 Uleguerand Range


Requirements/Notes:
* All party members require Chains of Promathia.
* One stack of Holy Water recommended for the tank.
* BRD highly recommended.
* Supports 3 parties.


Target mobs:
Primary: Kindred Demons
* Demon
* Aggro to Sight
* Links by Sight
* Weak against Light
* Strong against all other elements. (+25% Magic Def)

Kindred Black Mage (BLM)
Kindred Dark Knight (DRK)
Kindred Summoner (SMN)
Kindred Warrior (WAR)

Primary: Smolenkos
* Ahriman
* Aggro to Sight
* Aggro to Sound
* Not Linking
* Strong against all elements. (+25% Magic Def)

Primary: Molech
* Taurus
* Aggro to Sight
* Aggro to Sound
* Links by Sight
* Has True Sight
* Weak against Light.

Commentarus:
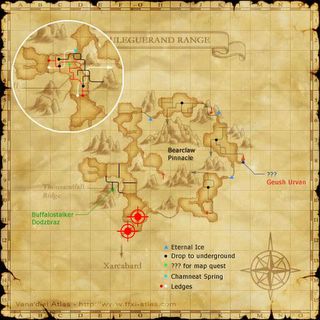
My preferred camp would be the final upwards ramp at (F/G-7) leading to the top of the Uleguerand Range. From there, you can pull from either the top or bottom part of the ramps, leading to plenty of kills. I've seen parties camp at the other two displayed camps before, although I have no actual personal experience with either.

Some things to note. Take note walking up to camp for the various Taurus mobs, since they have true sight. Also, be sure not to fall down any holes while walking up to camp. Once there, your primary target will be the various Kindred Demons, with Smolenkos and Molechs thrown in for good measure.

Kindred Black Mages should be silenced for obvious reasons. Kindred Summoners may, on occasion have a Dark Elemental out as a pet, in which case just ignore it the best you can (or Lullaby it) and take out the Summoner. Kindred Summoners also drop Dark Spirit pacts as a rare drop, which is very nice. ^^ However, because Kindred Summoners may occasionally have a Dark Spirit out as a pet (its other pet is a Thunder Spirit), you will need a Bard to Lullaby the Dark Spirit.

Smolenkos are a pain to kill. Not only are they resistant against all forms of magic, they have Magic Barrier (that completely nullifies all magic attacks against them), as well as Level 5 Petrify. Since most parties come here for merit points (i.e. everybody is Level 75), this usually results in the entire party being petrified. Fortunately, it doesn't last for very long.

Finally, you have the Molechs, which are the weakest of the three types of mobs you xp off here. The only real danger these guys pose is Mortal Ray, which inflicts Doom on a single target (usually the tank). If left alone, Doom kills the target within ten seconds. Cursna or Holy Waters are required to remove Doom, although each Cursna or Holy Water only has a 25% chance of actually working, so have all mages with a /WHM spam Cursna on the tank as soon as Mortal Ray goes off. Alternatively, Mortal Ray is an eye attack, meaning that it will have no effect if the tank turns to face away from the mob when it goes off.

You can also do moving parties here at the Uleguerand Range, with very good results given the correct setup. My personal favourite moving party route starts at the ramp camp (F/G-7) and clears the top part of the range. There are some rather large gaps in between mobs, but if your party is good, then you can pull the large chains in. ^^

66-68 Den of Rancor


Requirements/Notes:
* White Mage required (for Stona).
* Supports 1 party.


Target mobs:
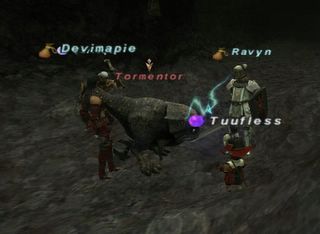
Primary: Tormentor
* Lizard
* Not Aggro
* Links by Sound
* Weak against Ice
* Weak against Wind

Commentarus:
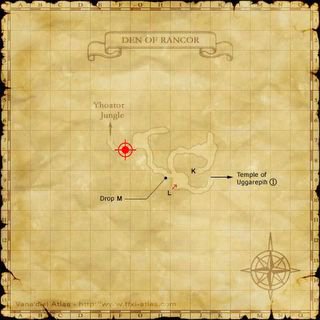
Enter from (J-7) of the Yhoator Jungle, just by Bloodlet Spring, or north of the Outpost. Once you zone in, you're practically at camp. Have the White Mage methodically keep Barfira up as per normal against all Lizard mobs for extra insurance against Fireball. While you won't have to go further into the Den of Rancor, make sure the puller doesn't fall through the holes down the right hand tunnel.

There might be a random, lone Puck in the middle of the Tormentors that you should be aware of, as it aggroes by Sound, but it's only slightly harder than the surrounding Tormentors.

52-55 Kuftal Tunnel


Requirements/Notes:
* RDM or BRD practically required.
* Supports 4 parties.


Target mobs:
Primary: Robber Crab
* Crab
* Aggro to Sound
* Not Linking
* Weak to Ice
* Weak to Thunder
* Strong against Water

Commentarus:
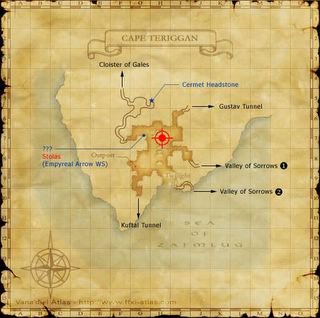
If you stick to the more conventional camps, Kuftal Tunnel is the start of a loooong line of crabs for you to kill. While most people won't even think of xp'ing without a Red Mage or a Bard for the mana Refresh, those two jobs are even more important here because the Robber Crabs love to spam buffs on themselves, not to mention that they also like using Bubble Shower (AoE STR-Down) to keep White Mages happy, too.

The passageway that spans (I-4) through to (I-7) is quite literally infested with Robber Crabs for you to xp on, so while pulls might be long if the place is crowded, it's unlikely you'll actually run out of mobs. The Cape Terrigan zone camp can even support two parties if camps are all taken, although it is a rather tight squeeze in there.

One thing to be very careful of if you're not camping at the Cape Terrigan zone, is Guivre that occasionally pops around to make life interesting. Guivre will make mincemeat of you and your party, so if you see him, put up both Sneak and Invisible and /shout to warn the zone know that he is around. Having a wyvern run rampage across the xp parties might look funny, but he really does disrupt things, especially since he wanders all over the top floor of Kuftal, too. I hear he despawns eventually, if left alone, although I have no idea how long it takes for him to do so.

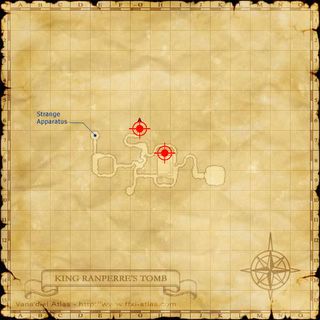
53-56 King Ranperre's Tomb


Requirements/Notes:
* Supports 2 parties.


Target mobs:
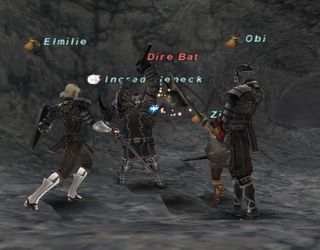
Primary: Dire Bats
* Bat
* Aggro to Sound
* Links by Sound
* Weak to Piercing weapons
* Weak to Wind
* Weak to Light
* Very Strong against Darkness

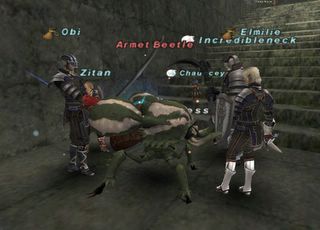
Primary: Armet Beetle (55-57)
* Beetle
* Aggro by Sight
* Links by Sight
* Weak against Ice
* Weak against Light

Commentarus:
Your camp is quite literally where you end up when you teleport into the higher area of King Ranperre's Tomb. It's rather cramped since there is a Dire Bat pop very close to camp, so take care. The worms do not aggro.

The (slightly) higher camp is further into King Ranperre's Tomb, fighting Armet Beetles in addition to Dire Bats. Camp just at the base of the stairs that lead outside, although be careful as you still may attract aggro from the Beetles behind.

Be very careful when pulling, as links will be very problematic. Neither camp provides a safe spot to run away, and bats are resistant to Sleep.

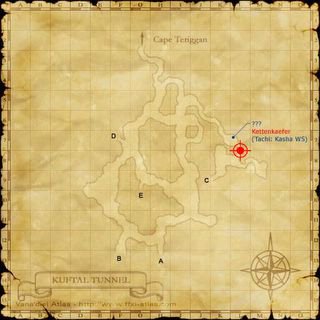
56-60 Kuftal Tunnel


Requirements/Notes:
* WHM highly recommended (for Viruna).
* NM: Yowie
* Supports 2 parties.

Target mobs:
Primary: Deinonychus
* Raptor
* Aggro to Sound
* Not Linking
* Weak against Water
* Strong against Fire

Primary: Goblin
* Goblin
* Aggro to Sight
* Links by Sight
* Weak to Light

Goblin Alchemist (WHM)
Goblin Bandit (THF)
Goblin Mercenary (WAR)
Goblin Tamer (BST)

Commentarus:
These are one of my personal favourites. Both camps are quite far apart, so there shouldn't be any competition unless two parties take the same camp. -_-

Some things to note is that the tank should try to keep the mob faced away from all the mages, lest they get diseased from the Raptor's breath attack. You'll need a White Mage to Viruna it off. Of course, you could party here without a White Mage, but your tank had better be legendary. Disease lasts a long time. >_<

If you're camping my the pond, be sure not to use any AoE effects, otherwise you might hit one of the Worms around the place. Pull from either one of the three tunnels leading to the pond. Sometimes, people will be around for the Phantom Worm, whose spawning ??? is nearby. Be careful if your local server's gilsellers are in the area though- they might MPK whoever spawned the Phantom Worm and you'll be collateral damage. The people fishing behind you are after Devil Mantas. Also, the raptors you are xp'ing off are also placeholders for Yowie. We tried killing Yowie, but he made short work of our Ninja. >_<

If you're camping by the ??? for Tachi: Kasha, there is a raptor spawn fairly close to camp, so be careful. You can pull from either end of the tunnel.

As the party gets higher (towards 60), you can also start xp'ing off the Goblins that wander around the area.

62-64 Cape Terrigan


Requirements/Notes:
* WHM required (for Stona).
* Supports 2 parties.


Target mobs:
Primary: Sand Cockatrice
* Cockatrice
* Aggro to Sight
* Not Linking
* Weak against Wind
* Strong against Earth

Commentarus:
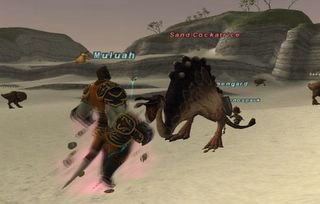
Camp on either side of the opening to the clearing with all the Cockatrice. You'll have to watch from the occasional aggro from a Goblin Alchemist that wanders around the area, but they shouldn't be too much of a hassle. Melees might have a little bit of trouble hitting the Cockatrice if they're not level 63.

Have the White Mage macro both Stona and Silena. The Cockatrice don't spam them too often, but enough to keep the White Mage on perpetual alert.

26-28 Yuhtunga Jungle


Requirements/Notes:
* All party members require a Key Item: Airship pass for Kazham.
* Supports 1 party.


Target mobs:
Primary: Goblin Furrier (RNG)
* Goblin
* Aggro to Sight
* Links by Sight
* Weak against Light

Commentarus:
XP here is very nice, since Ranger mobs are soft and have terrible evasion compared to other classes. The Goblin Furriers are a little spaced out though, so having some way to look for them is helpful.

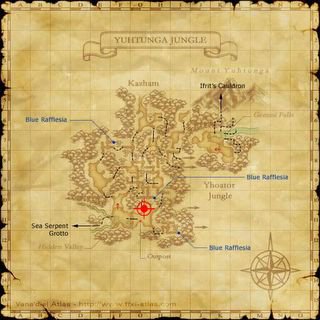
In reality, any of the three tunnels leading up towards the Outpost can serve as a camp, however, the marked location is the one with the closest spawns. The Goblin Furriers are rather spread out, so having Widescan is very useful. In addition, since they are all RNG mobs, be sure to have the puller run past the party so the Furrier follows suit. Be careful not to fall down any of the holes while pulling!

Be careful of the Overgrown Roses though- they're ten levels higher than the Furriers. >_<

52-55 Uleguerand Range


Requirements/Notes:
* All party members require Chains of Promathia.
* Paralyna required.
* Popular NPC Fellow spot.
* Supports 2 parties.


Target mobs:
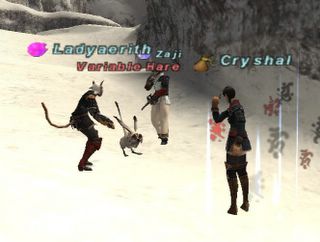
Primary: Variable Hare (52-53)
* Rabbit
* Not Aggro
* Links by Sight
* Weak against Water
* Weak against Thunder
* Weak against Darkness

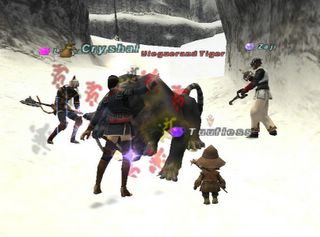
Primary: Uleguerand Tiger (53-55)
* Tiger
* Aggro to Sight
* Links by Sight
* Weak against Fire
* Weak against Thunder
* Strong against Ice

Commentarus:
The Variable Hares in the Uleguerand Range act as a nice bridge between Garlaige Citadel and Kuftal Tunnel. In fact, the Uleguerand Tigers are the same levels as the Robber Crabs in Kuftal, so a party can easily made the transition to the higher level mobs here. Make sure to keep the mages well away from the mob though- both the Rabbits and Tiger have AoE effects (Whirl Claws and Roar) that you really want to keep off the mages.

The camp closest to the zone is more for the higher level parties who want to xp off Tigers, while the camp on the down slope is for the lower level parties that want to xp off the rabbits. Because of collateral damage from AoEs, you don't really want two camps in either spot.

In addition, take care when pulling Tigers at night, since their spawn points are shared with Cwn Annwn (undead Hound mobs) at night. If you're pulling on the down slope, Rabbits can be found on the lower area, although watch for aggro from the surrounding Buffalos and Bombs, although they are very spaced out.

69-72 Ro'Maeve


Requirements/Notes:
* All members require some Silent Oils.
* RDM recommended.
* At least one member must have a Key Item: Moongate Pass to camp at the inner camps. *see comments.
* Supports 6 parties.

Fields of Valor:
Book: (G/H-6), (H-11)
Page 4:
6x Apocalyptic Weapon, 1x Darksteel Golem (1540xp/gil)
Page 5:
6x Infernal Weapon, 1x Darksteel Golem (1540xp/gil)


Target mobs:
Primary: 2nd-tier Weapons
* Weapon
* Aggro to Sound
* Aggro to Magic
* Not Linking
* Weak against Fire
* Slight resistance against all other elements (+12.5% Magic Def)

Apocalyptic Weapon (WAR)
Infernal Weapon (RDM)

Primary: Darksteel Golem
* Golem
* Aggro to Sight
* Aggro to Magic
* Not Linking

Commentarus:
It used to be that you required a Key Item: Moongate Pass in order to xp off the Infernal and Apocalyptic Weapons here, although an update has since changed to weapons outside the two moongates to support two additional camps at (B-10) and (M/N-10), which have plenty of Weapons to pull. Just be careful not to get aggro from the dolls though.

That being said, it is recommended that you party inside, simply because it also gives you access to the occasional Darksteel Golem to end a chain with. The area inside the moongates, commonly referred to as "{moon}", is split into two disjoint halves, and each half is further subdivided into two connected halves. Each "quarter" of moon can comfortably support one party each with a little bit to spare. Pretty much any empty room will suffice for a camp, but it's generally safer to stick to the rooms on the outer rim of moon.

You may get the occasional magic aggro from the weapons wandering by as you xp though, so keep those Sleeps and Lullabys handy.

However, you do need a moongate pass to access moon (for obvious reasons). For details on how to obtain your moongate pass, I've written an entry over on my blog which you can find here.

Infernal Weapons are RDM mobs, and as such, have a lot of buffs that need to be taken care of, hence having a Red Mage is highly desirable because of the low recast time on Dispel, that and being able to land a Silence on Infernal Weapons more reliably.

Also note that 72 isn't really a hard cap on the area. The Darksteel Golems still con VT to a Level 75 character, and so you can actually xp here all the way to 75. However, there are just better places to xp at 73, which is why that 'cap' is there.

45-47 Quicksand Caves


Requirements/Notes:
* Echo Drops highly recommended for mages/NINs/PLDs.
* Supports 1 party.


Target mobs:
Primary: Sand Spider (45-46)
* Spider
* Not Aggro
* Links by Sound
* Weak against Ice

Primary: Helm Beetle (45-46)
* Beetle
* Not Aggro
* Links by Sight
* Weak against Ice
* Weak against Light

Primary: Antica (45-47)
* Antica
* Aggro to Sound
* Links by Sound
* Weak against Wind
* Very Strong against Earth
* Very Strong against Darkness

Commentarus:
It's been said that two parties can camp here, but with only five Helm Beetle spawns in total, that is very unlikely.

Start with the Spiders and Beetles, and as people advance in levels, upgrade to Antica. White mages need to Erase a Spider Web's slow before reapplying Haste, and should take care to stay out of the Antica's Jamming Wave move (AoE Silence). The repop timer on Helm Beetles is not quick enough to just xp off them alone (assuming your party is good), so you will need to mix in the occasional Spider as well.

With Antica, Sand Trap is a hate reset, so take care in the few seconds right after a Sand Trap goes off while your tank re-establishes hate.

72-75 Lufaise Meadows


Requirements/Notes:
* All party members require Chains of Promathia.
* All party members require Tavnazian Archipelago access.
* WHM recommended. *see comments.
* Supports 2 parties.


Target mobs:
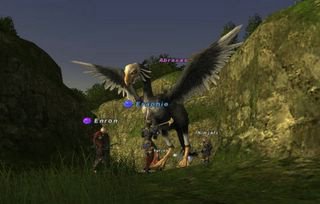
Primary: Abraxas
* Giant Bird
* Aggro to Sight
* Links by Sight
* Weak to Piercing weapons
* Weak to Ice
* Weak to Light
* Strong against Wind

Primary: Tavnazian Ram *see comments
* Ram
* Aggro to Sight
* Links by Sight
* Strong against Ice

Commentarus:
The Abraxas are nice to xp off since they all con high-VT to low-IT to a 75 character, so xp flows nicely. That said, they share all typical Roc traits, including a fast attack rate, and hit quite hard as well. Abraxas also happen to have a noticably high resistance against Sleep effects, so take extra care to avoid pulling a link.

Pullers should note that Abraxas do have a quick attack rate, so someone /NIN is recommended for pulling, to the extent that even Bards sub Ninja when pulling for manaburn parties down here! Other than that though, Thieves have the added advantage of being able to Hide to lose aggro, which is especially useful since Abraxas are, as mentioned above, very difficult to sleep.

You can also xp off the Tavnazian Rams, which make slightly better closers to a chain. However, the Rams have a very strong AoE Max HP Down effect, and a line-of-sight Petrify move, so a White Mage is required against these. Tavnazian Rams also track based on smell.