Requirements/Notes:
* All party members require Chains of Promathia.
* One stack of Holy Water recommended for the tank.
* BRD highly recommended.
* Supports 3 parties.

Target mobs:
Primary: Kindred Demons
* Demon
* Aggro to Sight
* Links by Sight
* Weak against Light
* Strong against all other elements. (+25% Magic Def)
Kindred Black Mage (BLM)
Kindred Dark Knight (DRK)
Kindred Summoner (SMN)
Kindred Warrior (WAR)
Primary: Smolenkos
* Ahriman
* Aggro to Sight
* Aggro to Sound
* Not Linking
* Strong against all elements. (+25% Magic Def)
Primary: Molech
* Taurus
* Aggro to Sight
* Aggro to Sound
* Links by Sight
* Has True Sight
* Weak against Light.
Commentarus:
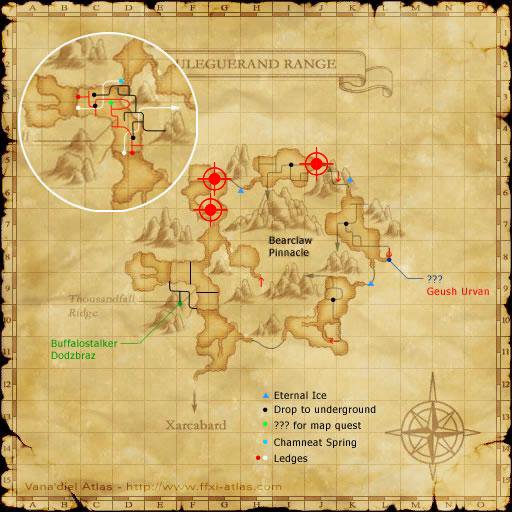
My preferred camp would be the final upwards ramp at (F/G-7) leading to the top of the Uleguerand Range. From there, you can pull from either the top or bottom part of the ramps, leading to plenty of kills. I've seen parties camp at the other two displayed camps before, although I have no actual personal experience with either.
Some things to note. Take note walking up to camp for the various Taurus mobs, since they have true sight. Also, be sure not to fall down any holes while walking up to camp. Once there, your primary target will be the various Kindred Demons, with Smolenkos and Molechs thrown in for good measure.
Kindred Black Mages should be silenced for obvious reasons. Kindred Summoners may, on occasion have a Dark Elemental out as a pet, in which case just ignore it the best you can (or Lullaby it) and take out the Summoner. Kindred Summoners also drop Dark Spirit pacts as a rare drop, which is very nice. ^^ However, because Kindred Summoners may occasionally have a Dark Spirit out as a pet (its other pet is a Thunder Spirit), you will need a Bard to Lullaby the Dark Spirit.
Smolenkos are a pain to kill. Not only are they resistant against all forms of magic, they have Magic Barrier (that completely nullifies all magic attacks against them), as well as Level 5 Petrify. Since most parties come here for merit points (i.e. everybody is Level 75), this usually results in the entire party being petrified. Fortunately, it doesn't last for very long.
Finally, you have the Molechs, which are the weakest of the three types of mobs you xp off here. The only real danger these guys pose is Mortal Ray, which inflicts Doom on a single target (usually the tank). If left alone, Doom kills the target within ten seconds. Cursna or Holy Waters are required to remove Doom, although each Cursna or Holy Water only has a 25% chance of actually working, so have all mages with a /WHM spam Cursna on the tank as soon as Mortal Ray goes off. Alternatively, Mortal Ray is an eye attack, meaning that it will have no effect if the tank turns to face away from the mob when it goes off.
You can also do moving parties here at the Uleguerand Range, with very good results given the correct setup. My personal favourite moving party route starts at the ramp camp (F/G-7) and clears the top part of the range. There are some rather large gaps in between mobs, but if your party is good, then you can pull the large chains in. ^^
2 comments:
Molechs are weak to blunt attacks. Monks will own these so fast its not funny.
I suggest suicide pulls for certain demons, since hide does not work and these have a higher tendency to resist lullaby and sleep than other mobs.
Ahirimans actually don't have much defense to start.
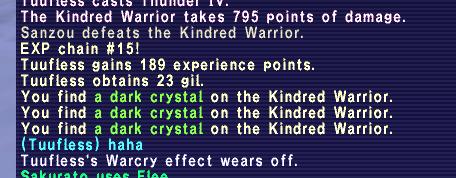
This camp is very good profit. Dark Spirit Pact from SMN demon, ahirman wings, demon horns, and demon skulls, along with tons and tons of dark crystals.
we have tried moving parties in the past but the results been so-so. demons have higher resistance to lullaby, and the fact these mobs are on 5-minute repop timers don't help. (twice we had wipes from repops b/c the bard with the best gear/merits in the world simply could not land lullaby) the moving parties that make the big chains off weapons in sky simply don't get the big chains out here. the demons have much more HP and much higher defense than the d-weapons, plus that even nastier TP jump move that only demons in Uleguerand Range have (heavy damage + stun, is conal, may be blocked by utsusemi). also keep in mind there are 2 blm type mobs to contend with, and these are usually the chain-killers.
instead we simply too the one camp, had the puller leave early for the next mob (when the mob was around 25%), and whoever had hate on molech had to turn their back (b/c i have gone 1 for lifetime in getting cursna to land, and you're lucky to get 2 cursnas off in 10 seconds b/c of the recast of that spell in addition to it being slow-casting to start) while everyone else attacked from behind (because it is an monk-type mob)
Suggested party set up (All melee should be at least 74):
Nin, war, war, war, brd, rdm
Of course, nin first tanks, but after rampages, war would share tank the rest of the fight.
That would give you insane exp with chains~
I've been here as a nin and rdm,
it's just impossible to keep shadows up all the time, and mob hits very hard, so a backup tank (another nin or war/nin) is a must.
This is not a place for PLD and BLM for sure. it is a place for DoT damagers.
I've been here so many times without good exp, even with a
typical exp party setup like: 2 sams, 1 nin, rdm, whm, blm, i had like 3k / hour... so less, so don't even think about coming here without a war, a nin and at least a brd or cor!
If the fight last too long, you'll gonna use up all your mages mp.
Post a Comment