31-34 Bibiki Bay: Purgonorgo Isle


Requirements/Notes:
* All party members require Chains of Promathia.
* Long time to get to camp.
* Instant Warp scrolls highly recommended.
* Key Item: Manaclipper ticket required (can obtain on-site).
* Supports 2+ parties.


Target mobs:
Primary: Alraune (31-34)
* Mandragora
* Not Aggro
* Links by Sound
* Weak against Piercing weapons
* Weak against Wind
* Weak against Fire
* Weak against Ice
* Weak against Thunder
* Weak against Darkness
* Strong against Light

Primary: Toucan (31-34)
* Bird
* Not Aggro
* Not Linking
* Weak against Piercing weapons
* Weak against Ice
* Strong against Wind

Secondary: Coastal Opo-opo (31-32)
* Opo-opo
* Not Aggro
* Links by Sight
* Weak against Ice

Commentarus:
As mentioned above, it takes quite a while to get to camp, so be sure people can stay for a long time to make the trip worthwhile! The good news is that because of this, this camp is almost never taken. Be sure to bring a scroll of Instant Warp each though, otherwise you'll find getting back to town will be even more of a chore. ^^

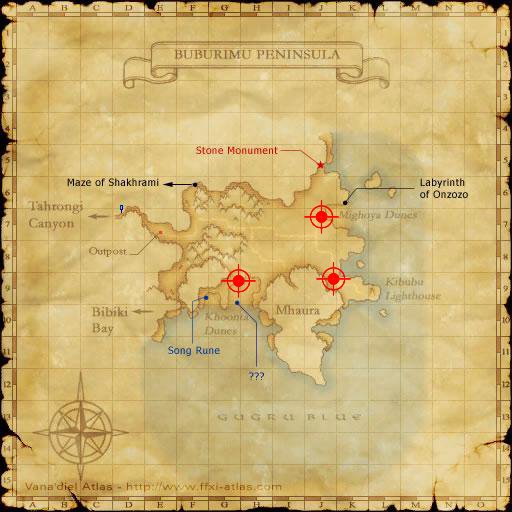
You will need to head down to Bibiki Bay and purchase a ticket to ride the Manaclipper over to Purgonorgo Isle. Be warned that not every manaclipper boat goes to Purgonorgo Isle, so be sure to check with the Mithra that's conveniently standing on the jetty just where the next manaclipper will go to.

You will also need a Manaclipper ticket to board the manaclipper, lest you be unceremoniously booted and left behind on shore as the rest of your party members sail off into the distance. Manaclippers are not frequent, and you could be stuck waiting over fifteen minutes for the next one to arrive, so don't forget your tickets! >_<

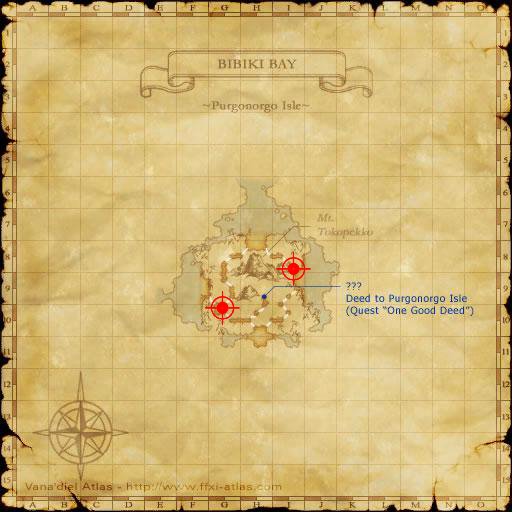
Once on Purgonorgo Isle, your main xp target will be the Alraunes. They have all the abilities of a normal (white) Mandragora, including Dream Flower. They are a little spaced out, so if you want to focus on just killing Alraunes, Widescan is useful, but not necessary due to the number of mobs in the area you can xp off. Alraunes respawn every five minutes though, so supply should be plentiful.

Coastal Opo-opos are an okay filler, and are noticeably weaker than the Alraunes once a member hits Level 33. They have a rather painful AoE attack, and can also Dispel a single buff off a single target, so have your healers vigilant on keeping buffs up. Fortunately, they don't spam their dispel very often, so it's not too much of a pain to just reapply, but they aren't the most pleasant of xp mobs, at least compared to what you have available.

Also note that there are a lot of other potential campsites in Purgonorgo Isle, just that nobody's gotten around to finding them yet. So, if you feel like exploring a little, try camping somewhere else on the island. ^^

29-32 Yuhtunga Jungle


Requirements/Notes:
* All party members require a Key Item: Airship pass for Kazham.
* Supports 2 parties.

Fields of Valor:
Book: (F-9), (G-5), (G-11), (K-6)
Page 4:
4x Sahagin, 6x Makara (880xp/gil)


Target mobs:
Primary: Sahagin
* Sahagin
* Aggro to Sound
* Links by Sound
* Weak against Thunder
* Very Strong against Water

Creek Sahagin (MNK)
River Sahagin (WHM)
Stream Sahagin (BRD)

Primary: Makara
* Pugil
* Aggro to Sound
* Not Linking
* Weak against Ice
* Weak against Lightning
* Very Strong against Water

Commentarus:
This spot makes a very nice continuation from Goblin Furriers, since it's literally across the cliff to the entrance of the Sea Serpent Grotto.

Remember to silence the River Sahagins to prevent curative magic, although wait a while for the melee to knock off any Blink shadows it may have up. As the Sahagin get weaker, you will want to gradually focus on killing Makara up to around level 30. By 31, quite a number of mobs will con Tough to you, but because of the wide level range of the mobs here, there should still be plenty of VT-IT mobs to pull, although if there are two parties at 31, things might get iffy.

Take note that the Makara are actually the mobs closer to camp, and are also slightly harder than the Sahagin, so be careful when pulling not to get aggro on the way back.

Finally, the closest Field Manual to you will be at the Elshimo Lowlands Outpost, which unfortunately isn't terribly accessible for the party to get a new training regime, unless someone goes off to take a break.

24-27 Yuhtunga Jungle


Requirements/Notes:
* All party members require a Key Item: Airship pass for Kazham.
* Supports 3+ parties.


Target mobs:
Primary: Yuhtunga Mandragora (24-26)
* Mandragora
* Not Aggro
* Not Linking
* Weak against Piercing weapons
* Weak against Wind
* Weak against Fire
* Weak against Ice
* Weak against Thunder
* Weak against Darkness
* Strong against Light

Primary: Goblin Smithy (25-27)
* Goblin
* Aggro to Sight
* Links by Sight
* Weak to Light

Goblin Smithy (WAR)

Commentarus:
The two Jungles of Yuhtunga and Yhoator have become the norm for parties leaving Qufim Island. The first step of this leveling stage involve taking on Yuhtunga Mandragoras and Goblin Smithys just outside the gates to Kazham, where there are two wooden fences that serve as decent camps near Kazham, and a smaller passage further south.

Start with Yuhtunga Mandragoras and slowly work towards taking down Goblin Smithies as party members level up. If you're really in trouble, make a run for Kazham. In the old days, this was the cause for legendary Goblin trains, but thankfully, an update changed things so that other parties would not be affected by this. Be careful though, as Mandragora's Dream Flower does not discriminate between parties, and will hit everbody in its radius.

Also note that there are other possible camps deeper in the jungles, although consistent and safe access to the target mobs are much trickier.

21-23 Qufim Island


Requirements/Notes:
* Silent Oils/Sneak recommended to move about Qufim.
* Be very careful of undead at night (20:00 - 04:00).
* Supports 7 parties.

Fields of Valor:
Book: (F-6), (I-8)
Page 3: 7x Greater Pugil, 3x Clipper (700xp/gil)
Page 4:
6x Gigas, 4x Greater Pugil (735xp/gil)


Target mobs:
Primary: Clipper (21-22)
* Crab
* Not Aggro
* Not Linking
* Weak to Ice
* Weak to Thunder
* Strong against Water

Primary: Greater Pugil (22-23)
* Pug
* Not Aggro
* Links by Sound
* Weak against Ice
* Weak against Lightning
* Very Strong against Water

Primary: Assorted Gigas (22-23)
* Gigas
* Aggro to Sight
* Links by Sight
* Strong against Ice
* Very Strong against Thunder

Commentarus:
Pugils and Gigas round off the Qufim leg for most people, with people opting to move onto the Jungles afterwards. Technically, xp here is only good up to Level 23, although newer players (or weaker parties) can xp all the way up to 25 before moving on.

Camps are scattered throughout Qufim. The popular camps are those shown to the north-west, right outside Delkfutt's Tower (F/G-6), and "Pug Alley" (H-6). Both of these camps can support two parties each, while everywhere else supports just one.

As per normal Qufim rules, be careful of undead pops during nighttime, as there are some undead spawn points that are fairly close to camp. Fortunately, should you see an undead pop, you have a few seconds to quickly move out of its aggro range.

If you choose to xp here past Level 23, your puller will need to start being selective with the mobs he's pulling, to make sure that he takes the higher-end mobs that will yield decent xp. Pugils are preferred over Gigas, mostly due to safer pulling, as well as being easier to manage in camp.

Also remember that unlike the vast majority of Pugils in Vana'diel, Greater Pugils link.

14-18 Korroloka Tunnel


Requirements/Notes:
* WHM recommended.
* Ranged party recommended. *see notes
* Supports 3 parties.


Target mobs:
Primary: Land Worm
* Worm
* Not Aggro
* Links by Sound
* Weak to Wind
* Weak to Light
* Strong against Earth

Commentarus:
Parties comprised of members that can effectively attack from a distance (BLMs, RNGs), with the appropriate support jobs will do very well here. That being said, a regular setup will still work, although there won't be able to take as much advantage out of the Worms' immobility, although there isn't too much in terms of inaccessible Land Worms due to surrounding aggressive mobs.

Walk up and down either one of the red paths given, killing Land Worms as you come by. The top map is situated right as you zone in from the Zeruhn Mines, and usually has other people solo'ing the Land Worms there. The second map is on the opposite end, towards the Eastern Altepa Desert zone line, and is generally empty, although you will have to be on the watchout for Air Elemental pops near the stairs.

The third camp is between the two- simply continue walking onwards from the first camp, and move towards the point marked "H" on the map. Be careful when crossing the bridge though, as mobs can still aggro you from down below.

One trick you can use to prevent massive amounts of damage to your party is to have your "tank" stay out of melee range, using Provoke to and ranged attacks to hold hate from afar. Note that this person doesn't actually need to be a tank class- RNG/WAR works very well. This way, other members of the party can freely melee the Land Worm without fear of retaliation, and Stonega is contained to just one person.

Keep Barstonra up at all times to minimize the effects of the Worm's spells, and if your White Mage is level 15 or above, keep the Land Worms Silenced to minimize their damage output. As they say, a Silenced Worm is a dead Worm. By 17-18, a lot of the Worms will con Tough to members, so just mow down any Land Worms you come across.

12-14 Maze of Shakhrami


Requirements/Notes:
* WHM recommended.
* Ranged party recommended. *see notes
* Supports 1 party.


Target mobs:
Primary: Maze Maker
* Worm
* Not Aggro
* Links by Sound
* Weak to Wind
* Weak to Light
* Strong against Earth

Commentarus:
It is recommended that you bring a party full of members with ranged attacks, meaning primarily Black Mages and Rangers, although a regular pary setup will work, although they won't be able to take advantage of a Worm's immobility as much, and may have trouble safely fighting some of the harder-to-reach Worms.

Walk up and down the red path given, killing all Maze Makers you see. Some may be in the middle of other aggressive mobs, so be careful. How much you actually roam will depend on your party makeup (that is, a RNG party will be more maneuverable than a BLM party.)

Bring a White Mage along with you to the Maze. Be sure to keep Barstonra up at all times to minimize the effects of the Worm's spells, particularly Stonega. If you choose to stay onwards to 15, once your WHM learns Silence, use that as an effective way to prevent damage to your party (assuming, of course, it sticks).

59-62 Wajaom Woodlands


Requirements/Notes:
* Treasures of Aht Urhgan required.
* Near East access required.
* Supports 3 parties.


Target mobs:
Primary: Puk
* Puk
* Aggro to Sight
* Aggro to Sound
* Not Linking
* Weak to Piercing weapons
* Absorbs Wind

Target mobs:
One important thing to note about Puks is that they are unique because they absorb all forms of Wind damage. Wind-based spells like Gravity and Silence will be completely resisted, but all damaging spells like Aero, or Detonation skillchains will retroactively cause the Puks to recover hit points instead of damage it, so double check your damage sources, and skillchain.

Thankfully, higher level skillchains with a Wind component (for example, Fragmentation) don't cause the Puk to recover hit points, except when, of course, if you try to Magic Burst an Aero nuke on it. -_-

They have a very fast repop rate, so it's easy to chain these. Be careful to camp far enough away from other Puks such that when it uses its knockback move, Wind Shear it does not knock party members into aggro range of other Puks. Keep Baraera up to minimise the damage from Wind Shear as well.

59-63 Aydeewa Subterrane


Requirements/Notes:
* Treasures of Aht Urhgan required.
* Near East access required.
* Supports 3 parties.


Target mobs:
Primary: Defoliator (59-63)
* Crawler
* Aggro to Sound
* Links by Sound
* Weak to Ice
* Weak to Thunder
* Weak to Darkness

Primary: Aydeewa Diremite (61-64) *see notes
* Diremite
* Aggro to Sound
* Not Linking
* Weak to Water
* Weak to Light

Commentarus:
Top map:
Zone into the Aydeewa Subterrane from the south-east corner of (G-10) from the Wajaom Woodlands (the entrance marked "3" on the Vana'diel Atlas.

You could camp at the zone line back to the Wajaom Woodlands, which is safer, however there is a Great Ametrat that obstructs access to the majority of the Defoliators in the room.

The suggested camp is instead in the tunnel to the west, with two Slime Molds at the back, which will destroy your party should you get aggro. There are two tree-branches that creep up the sizes of that tunnel. Take these branches as a "DO NOT CROSS" line, lest you get aggro from the Slime Molds.

Lower map:
Zone into the Aydeewa Subterrane from either (I-6) of the Wajaom Woodlands to get to the northern camp, or (I-10) to get to the southern camp. Either way, if the camp you get to is occupied, you can simply walk to the other without having to leave the Subterrane.

The northern camp holds only Defoliators, while the southern camp has Defoliators mixed in with higher level Aydeewa Diremites, which you can xp off from Level 61 onwards. Hence, the southern camp is more suited to higher level parties, although it could hold two parties- one on Diremites, the other on Defoliators. Take care when pulling in the southern camps though, for there are Fossorial Fleas in the room that are aggro, and hard to see.

14-16 Buburimu Peninsula


Requirements/Notes:
* Echo Drops recommended.

Fields of Valor:
Book: (E-7), (I-9)
Page 2: 6x Carnivorous Crawler, 2x Sylvestre (500xp/gil)
Page 3: 5x Bull Dhalmel, 3x Carnivorous Crawler (525xp/gil)


Target mobs:
Primary: Bull Dhalmel
* Dhalmel
* Not Aggressive
* Links by Sight
* Weak to Wind
* Weak to Thunder

Primary: Zu
* Bird
* Not Aggressive
* Links by Sound
* Weak to Piercing weapons
* Weak to Ice
* Strong against Wind

Primary: Carnivorous Crawler
* Crawler
* Not Aggressive
* Links by Sound
* Weak to Ice
* Weak to Thunder
* Weak to Darkness

Commentarus:
Bull Dhalmel and Zu are similar to Damselflies in the Valkurm Dunes, although the Buburimu Peninsula is far less crowded (if ever).

Ninja tanks in particular like Dhalmels- they hit hard, but attack slowly, so Utsusemi will last a while. That being said, Dhalmel have a move called Cold Stare, which is a frontal Silence move. However, you need to be facing the Dhalmel in order for the Silence to take effect, so have your mages turn away from the Dhalmel to avoid getting Silenced.

Dhalmels also can Berserk, which, like the Warrior ability increases their attack (so the tank will take more damage), but drastically reduces their defense. If possible, save your weaponskills until after the Dhalmel uses Berserk for oodles of damage.

Zus and Carnivorous Crawlers are exactly the same level range as Bull Dhalmels. When fighting Zus, have your White Mage cast Baraera to minimise the damage from one of the Zu's special attacks, Wing Cutter.

In addition, mobs here are fairly spaced out, and in addition, some lower-tier Goblins may be interspersed here and there. When the highest level member of the party hits Level 16, quite a few of the mobs will con as Tough to him, although there will still be a few Incredibly Tough mobs here and there.